Way back when Bookworm turned 1, I started making the kids their birthday cakes. It was a wonderful, frugal way that I could do something special for their birthdays, and put all those summers spent as a child with 4H cake decorating classes to good use. When they were younger, it was really simple to pick whatever their favorite character or cartoon was at the time, and I’d come up with a design.
The problem is that as they’ve gotten older, the requests have become more complex, and I just don’t have the time to keep fiddling around with complicated things. Sometimes I’m able to order their designs of choice through a local bakery, sometimes I could come up with something off of Amazon, and other times I can’t and need to come up with something on the fly. That’s exactly what happened with these cupcake toppers.
Lady Bug is my only child who has a birthday during the school year. With the boys, we were able to plot and plan out different cupcake designs as the year came to an end. But Lady Bug’s birthday is not long after Christmas, and while I was on top of asking her what design she wanted on her cake for her party at home, it completely went over my head this year that she would want to bring in some cupcakes for her class.
Her answer to both her cake and the class cupcakes was Beat Bugs. There was no moment of hesitation. She’s been on a Beat Bugs kick lately. If you haven’t seen it yet, you should. It’s a show on Netflix that takes music from the Beatles and turns it into short little stories. Completely adorable cartoon, and awesome music to boot.
But I was having a problem finding something Beat Bugs themed. Sometimes I can get icing decorations and just pop them on top of the cupcake. But Beat Bugs isn’t something that’s very popular, like Finding Dory, or Sophia the First. Even the girls at Party City had no idea what Beat Bugs was, and looked at Bookworm and I like we were insane while trying to describe it.
But my Lady Bug wasn’t giving in. It had to be Beat Bugs. So I had to come up with something to make for her cupcakes and cake. I took to Google, and came up with these DIY Cupcake Toppers.
***Please note: the steps I show here were for personal use only. I assume no responsibility for any copyright infringement that happens if you decide to sell items made from images that are not your own, or that you don’t have copyright access to.***
What You’ll Need to Make Your Own Cupcake Toppers:

- Cardstock of your color choice – I used this blue package*
- 28lb printer paper – I used this Georgia Pacific Printer Paper* I picked up at Target a while back
- Craft Glue – I used this Tombow Mono Multi Liquid Glue*
- Craft Picks – I used these from Michaels
- 1″ Circle Paper Punch – I used this Recollections Punch
- 1.5″ Scallop Circle Paper Punch – I used this Recollections Punch
- Printed Images, of your choice
- Finished Cupcakes, of your choice
How To Make Cupcake Toppers
First, I went onto Google to search an image of the Beat Bugs. I found an image that I liked, and saved it to my computer.
I uploaded the image into Microsoft Word, then cropped and resized it so that the circle punch would not cut off any portion of the Beat Bugs’ faces.
I then copied the sized photo as many times as I could get it to fit on one sheet. The magical number for these photos were 6 images per page.
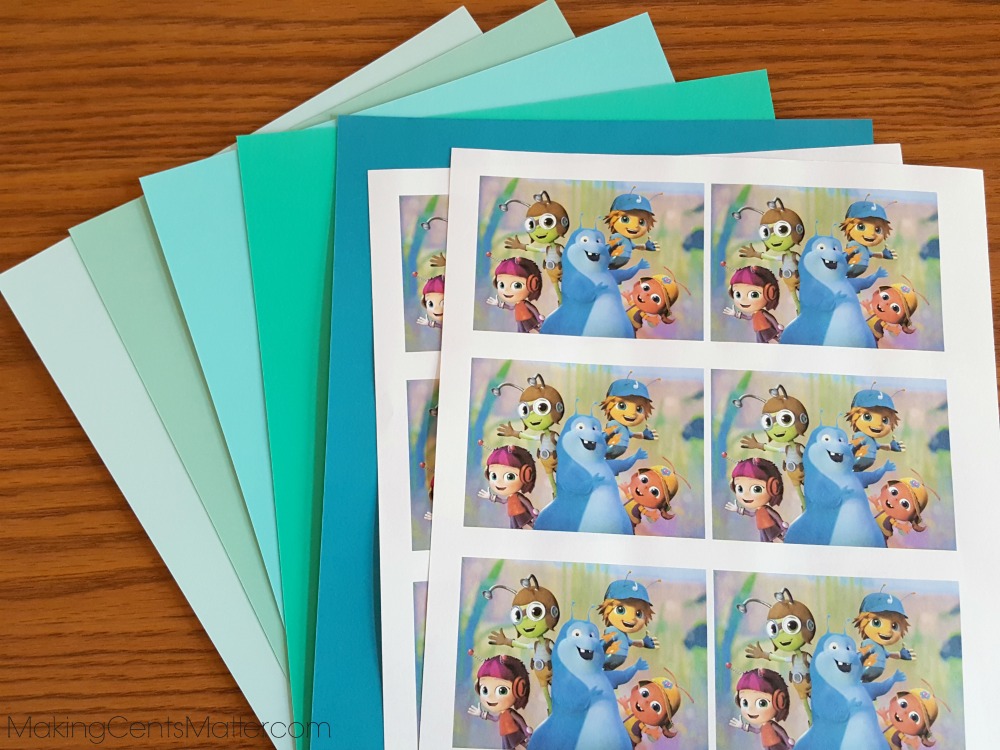
Now here comes some math. I knew that there were 16 kids in my daughter’s class, and a box of cupcake mix makes approximately 24 cupcakes. I wanted the images to be front and back, so I needed twice as many faces as I needed cupcakes. To get 48 Beat Bug faces, I would need 10 print outs at a minimum. {There are 5 Beat Bugs per image, so 10 images gets us to 50, which was closest to 48 without being under the amount I needed.}
I printed the images on the thicker, 28lb paper, because it would hold up a lot better than if I used regular printer paper. The thicker paper would not only hold the ink from my printer better, but it would also hold up to the glue much better.
After printing the images, I chose the cardstock colors I wanted, and started punching out about 50 scalloped circles.

I also trimmed the images down a bit so that the circle punch could punch out the faces easier. After punching out the first 4 faces, I had to trim around the remaining to get to the Walter in the middle. I punched out about 50 Beat Bug faces.

Apply some glue to the backs of the faces, and try to center them onto the scalloped punch out. Repeat this process for all the pieces, and allow them to dry. I’ll warn you, this step is the most tedious, and took me the longest. By the time I was done with the last one, the first piece was dry.

After allowing them to dry, you can begin gluing the craft picks to the toppers. Place a small amount of glue on the top of the pick, and place one topper over the glue, making sure to orient it the proper way. You don’t want to find out that you put the topper on upside down.
Once the glue dries to the first topper, place glue on the backside, including on the pick. Place, and line up the second topper, and hold them together for a few seconds while the glue dries.

Place the topper aside, and allow to dry completely. Repeat the process for the remaining toppers.

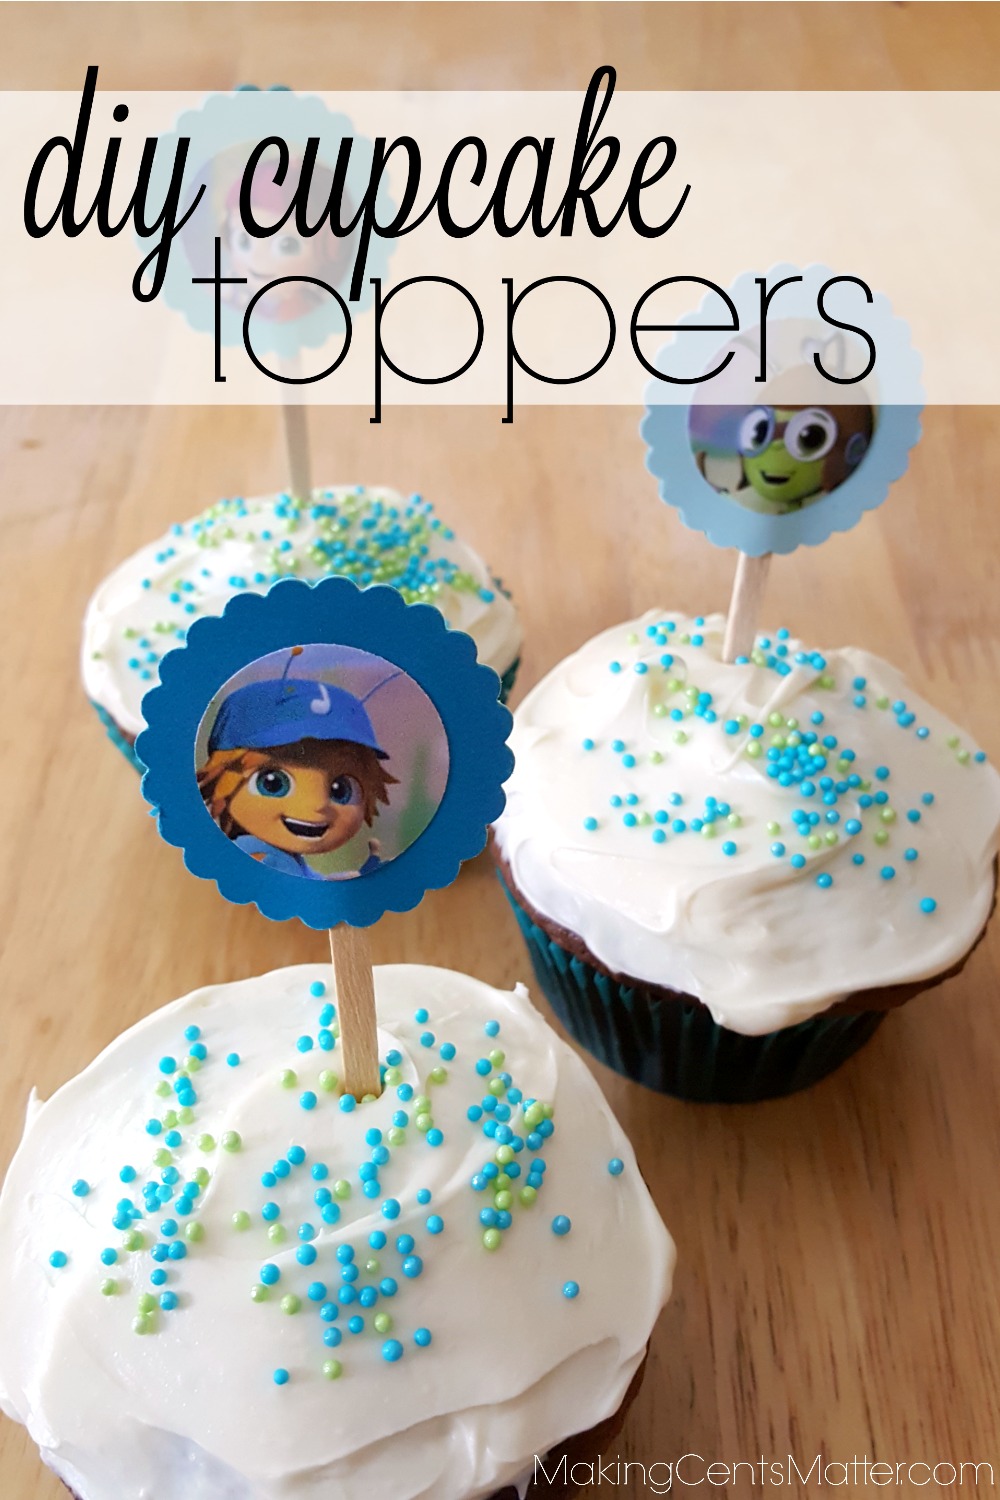
After all your toppers have dried, place them in your cupcakes!
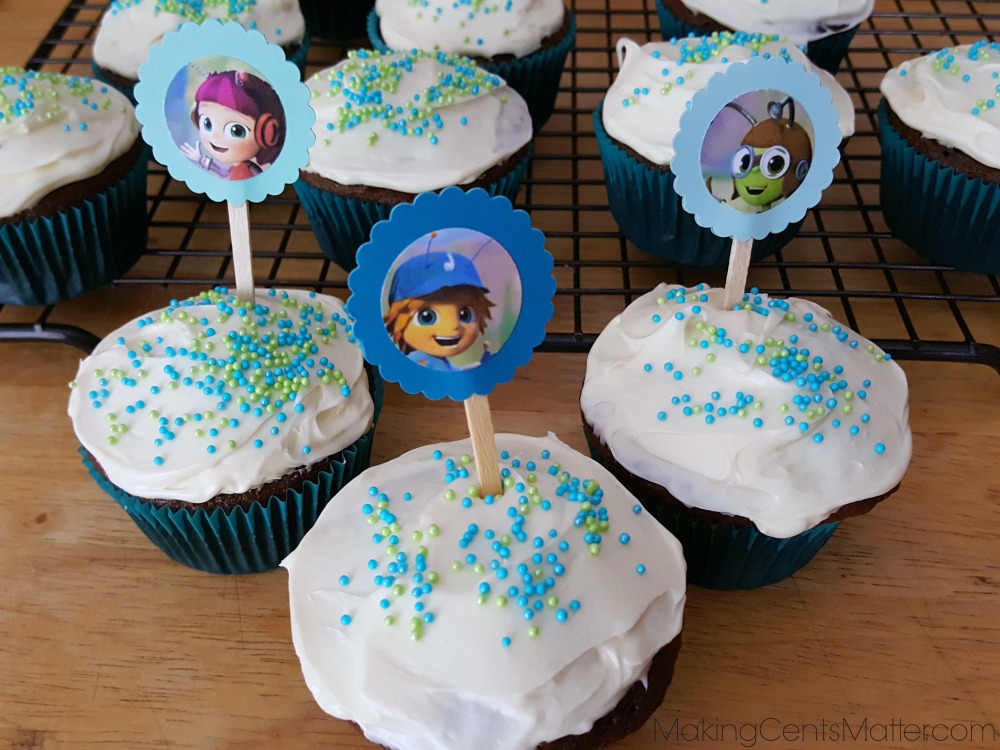
Don’t let the creativity stop at cupcakes. For Ladybug’s birthday party we had with family, I created a few more toppers that she then placed inside the cake where she wanted them. She was so happy she got her Beat Bugs cake and cupcakes, and that made it worth while!


Leave a Reply